Gguide
From 1100ad
Contents
|
Starting with the basics
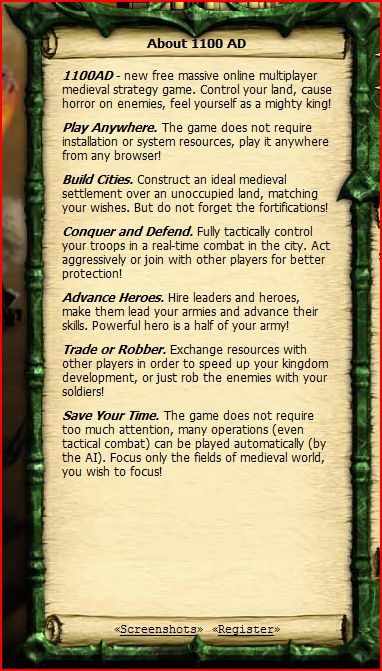
Once you Read the Introduction
decide to Register
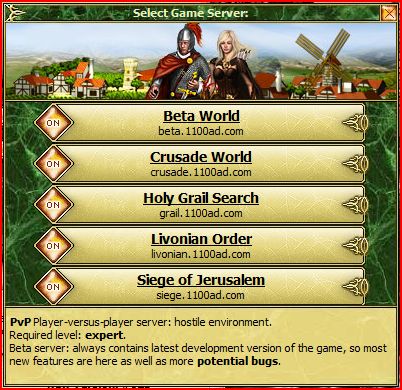
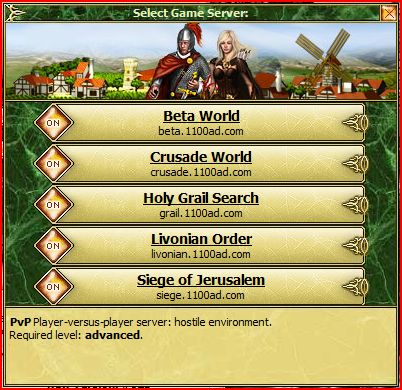
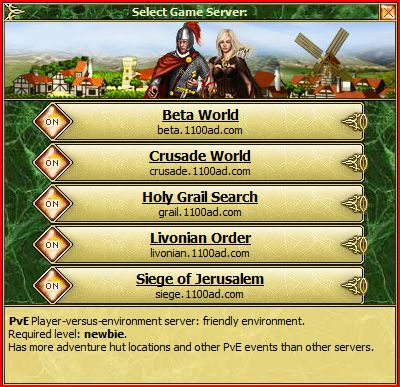
Select a Server from this list:
Beta Server
Crusade Server
Grail Server... Highly Recommended for anyone New to the Game!!!
Livonian Server
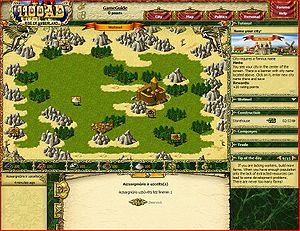
and Logon, you are presented with the Town View of your city which will be very similar to this one.
At this point, you might notice that:
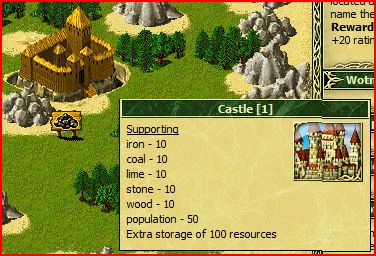
you have a level 1 castle (move your mouse over it) to see:
your storehouse is being built:
your Town's Population is at Zero:
and none your resource buildings have been built.
City - Town
There is a tutorial on the top right hand corner of your browser window that will guide you through the steps to develop your city by configuring it to your desires, building and upgrading your buildings and employing your population as troops that will be formed into armies.
While your Storehouse is being built you can perform your first city configuration step.
Rename your City
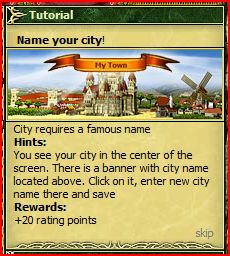
The first tutorial screen tells you:
- Nobody likes being stuck with a strange name. Fortunately, you can rename your city to whatever you desire.
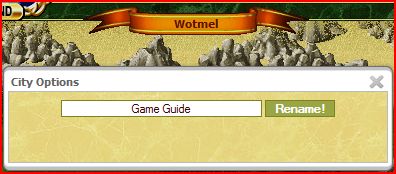
- Select the Banner of City name at the top center of the screen.. A city options menu will pop-up, allowing you to rename your city.
Type in a new name for your city and click on the rename and you end up with something like:
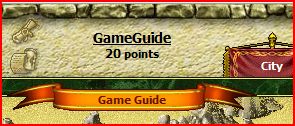
Take note of the fact that the game gave you 20 points for successfully renaming your city!
Hire a Hero
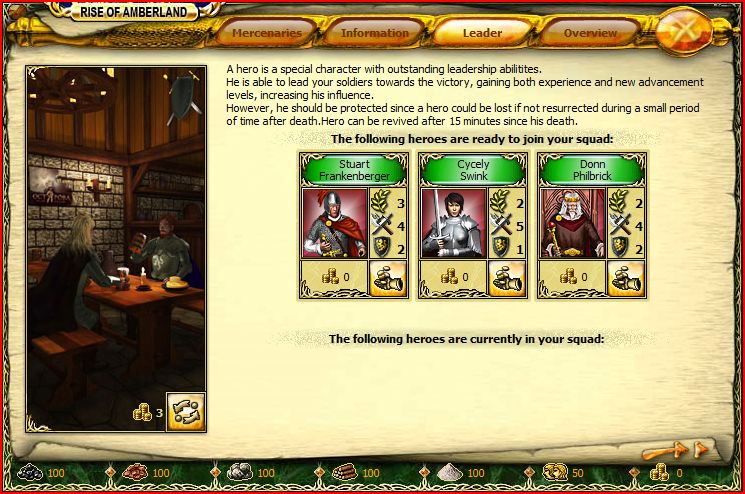
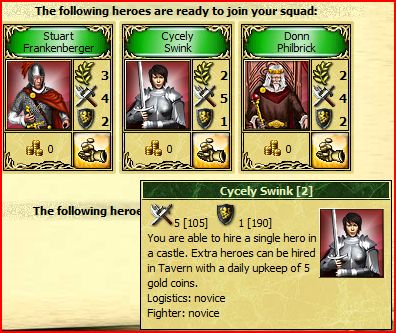
- Heroes are located in the castle. You are given three choices similar to these:
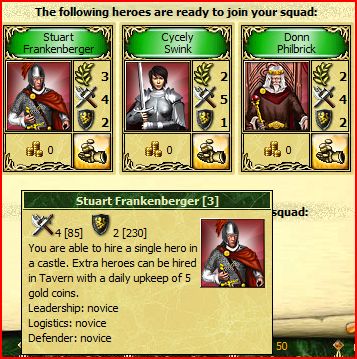
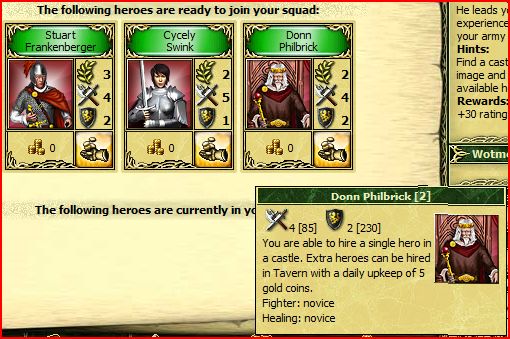
- Before selecting your favorite hero, mouse over each to see their special abilities. Here are three examples:
Notice in this case this hero has Leadership, Logistics and Defender.
In this case this hero has Logistics and Fighter.
In this case this hero has Fighter and Healing.
Refer to the following tables to get an explanation of each of the skills the hero comes with:
| Leadership | Soldiers have more health |
| Logistics | Your army gains faster movement between cities |
| Pathfinding | Your army travels faster within cities |
| Scouting | Increases Hero's sight range, at max it goes to range 4 |
| Knowledge | Increases hero experience per kill and plays a role in collector efficiency |
| Defender | Increases Army defense |
| Archery | Archers, Rangers and Marksmen become stronger |
| Fighter | Foot soldiers get stronger |
| Cavalry | Cavalry become stronger |
| Ballistics | Siege weapons do more damage |
These Symbols tell you the other attributes of the Hero
| Olive Leaf | The current level of the Hero. |
| Crossing Weapons | The Hero's attack power. |
| Shield | Hero's life. |
Each skill has four stages to it. Every time your hero increases a level, he gains another 1 point. Points can be applied to a skill to level it up. This table tells you how many points are necessary to increase a skill to the next level. Note: you can not raise a skill to the next level until the points have been applied to increase it to the previous level. Otherwise, it will take 6 points to raise a skill to Master from nothing.
| Points needed | Title | Points applied | Color |
|---|---|---|---|
| 0 | none | 0 | grey |
| 1 | novice | 1 | green |
| 2 | expert | 3 | yellow |
| 3 | master | 6 | red |
Refer to the available heroes you have in your castle and by using the tables above, make an educated decision about which hero you feel is best. For this Game Guide I chose Stuart Frankenburger.
Once you choose your hero you will notice you received the additional 30 points. Your total points should be 50.
Start gathering Resources
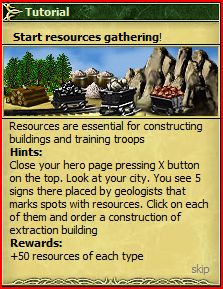
- The next Tutorial screen will now be telling you:
- Resources are what you spend to build your town and improve your army.
- By improving your resource buildings you will be able to extract more resources per hour.
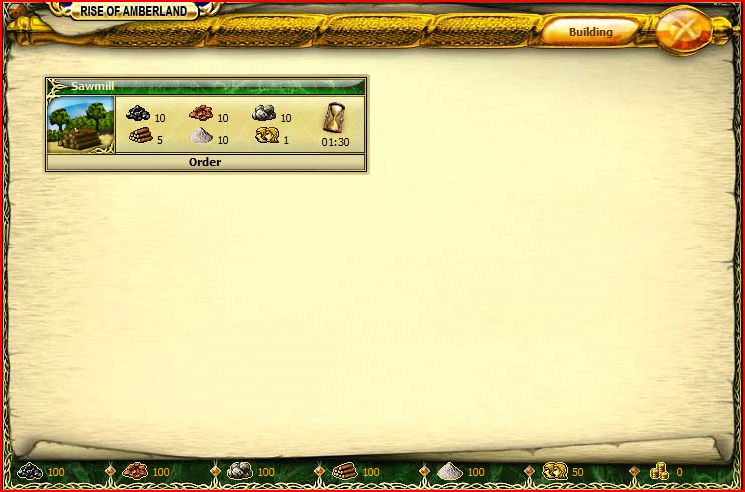
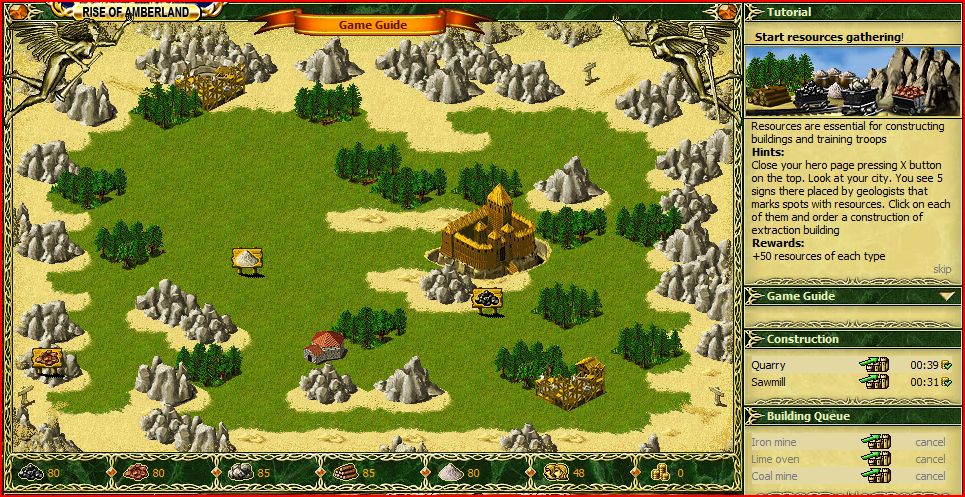
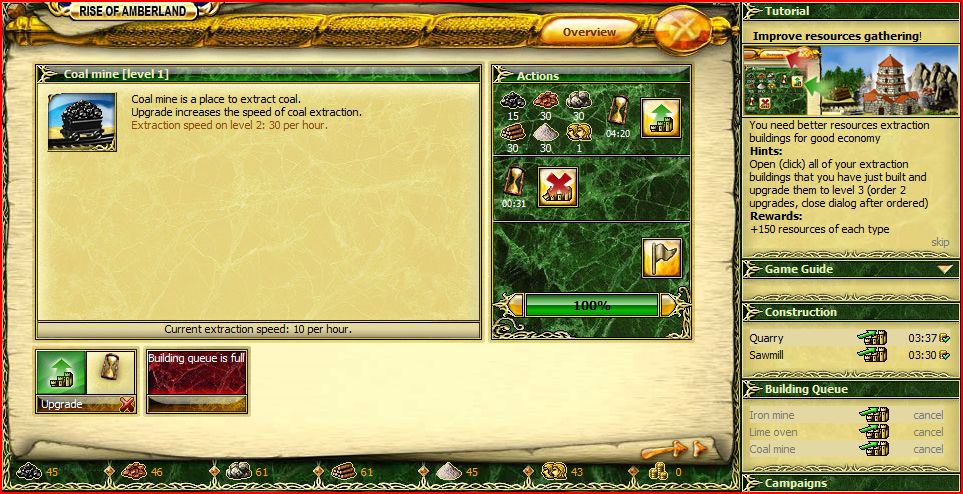
- Select each resource (sawmill, quarry, iron mine, Lime Oven and Coal Mine) and order each one to be built as can be seen here with the sawmill:
If you do this fairly quickly your window will look like this:
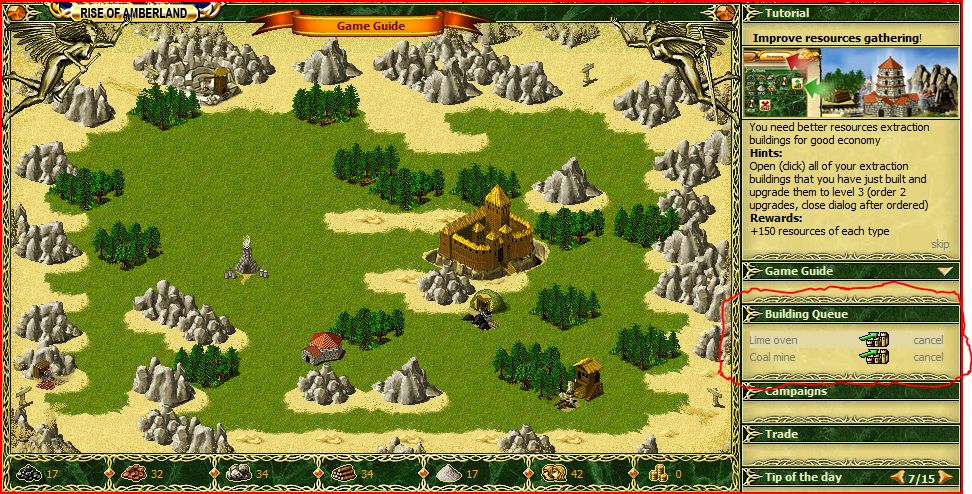
Notice that two buildings are being Constructed and three buildings are in the Queue. At this point, only two buildings can be under Construction and 3 more can be in the queue.
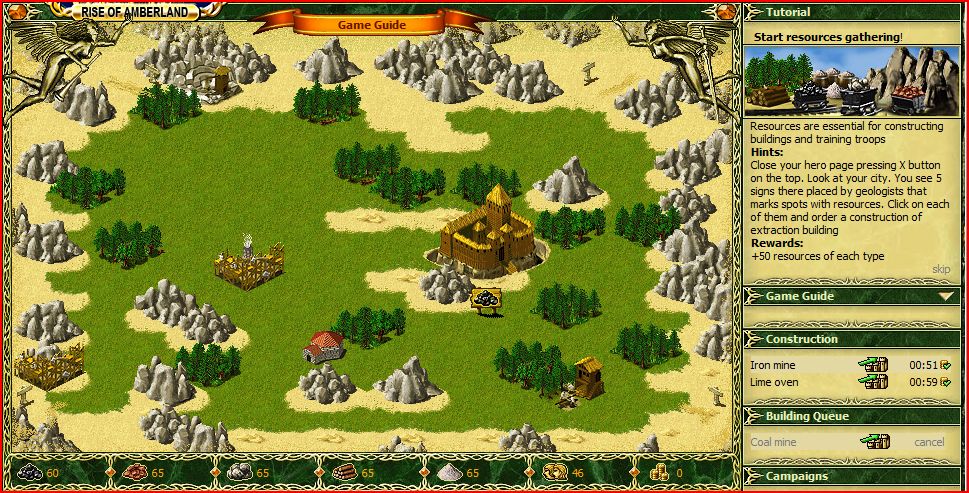
After the first two buildings are built your window should look something like this:
Notice how the first two buildings look complete on the town map and two more buildings have moved from the queue into the under Construction area.
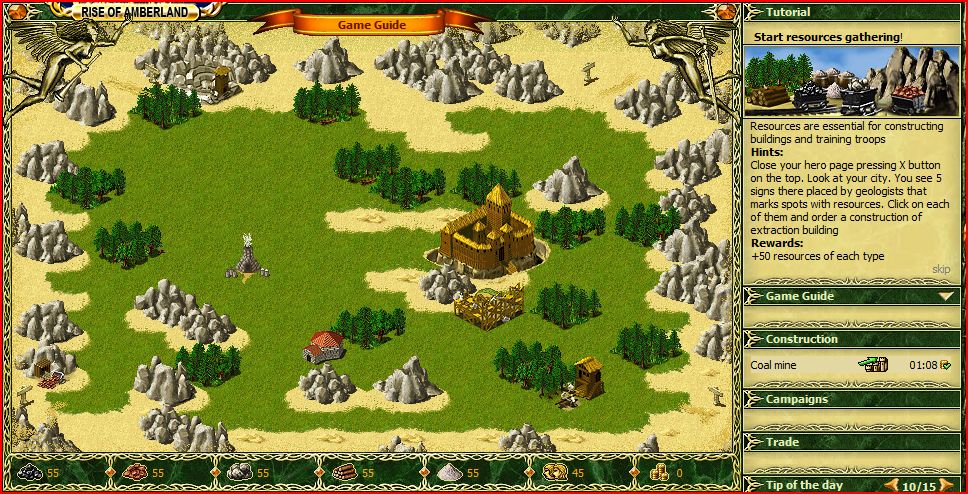
Once the 3rd building is completed, the last of the Resource buildings moves from the queue into the under Construction area in this screen shot it is the only one under Construction:
There will be times when you might have 5 buildings in the queue because there are not enough resources and/or certain building requirements have not yet been met.
Once this 5th building is completed you will notice the additional 50 resources get deposited in your storehouse giving you over 100 of each and the next tutorial appears.
[[file:GameGuide_Tutorial_4.JPG
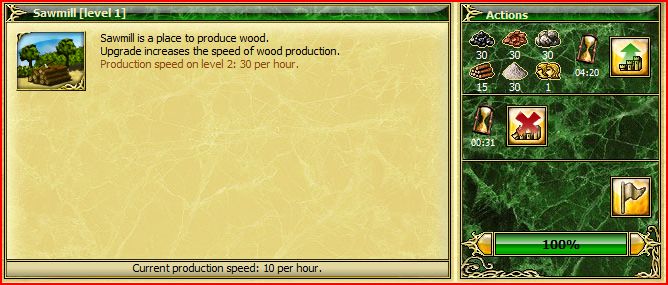
This time things will be slightly different. You will be selecting buildings and Upgrading them. Refer to this picture of the Sawmill:
You will notice this level 1 sawmill has a production rate of 10 per hour. Once it is upgraded to the next level it will be producing 30 per hour as you can read in this window. The Green arrow in the upper right hand corner when clicked, will order an upgrade to the building. If none of the required resources are red, then you will see an upgrade icon appear in the lower area and you should notice the building name appearing in the under Construction section on the right.
In spite of what the tutorial says, do this once for each of the five resources. This is faster than ordering up two upgrades for each building. Once you complete this your window should look something like this:
Notice that you are told the Building queue is full in RED. This means it will take about 17 minutes to complete if the resources are adequate to fulfill the building requests. In fact, during this building cycle you will notice that two or three buildings get built and two of them will be sitting in the queue but not getting moved into the under Construction area:
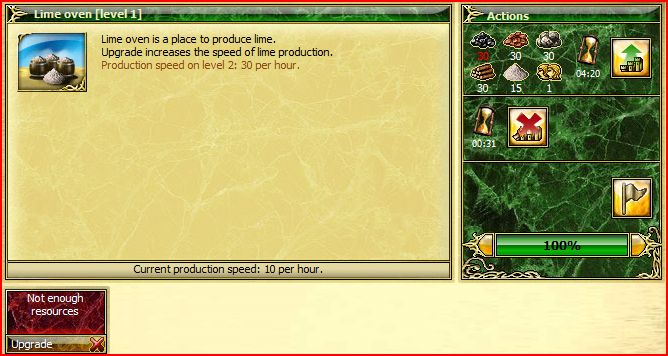
This is due to the fact that there are resources lacking. Click on one of the queued buildings and you will see something similar to:
The resources continue to be gathered and as soon as enough resources are gathered, the top building in the queue will move into the under Construction area and begin to be built.
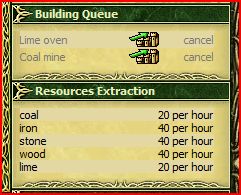
Eventually, you will see a Resources Extraction section appear on the far right indicating the rates of Extraction that each resource building is working at.
As soon as you would like to, order up an upgrade for all five resources one more time. Once they complete (in several hours) your storehouse will receive the additional 150 of each resource and you will be ready for the next tutorial.
Take note that as each city improvement completes, your Points at the top center of the window are steadily increasing. By the time these resource buildings are finished upgrading, you should have close to 150 Points.
Improve City Population
- Farms supply population for upgrading buildings or creating troops.
- Create a farm by clicking on an empty square of land and choosing the farm building. Alternatively, you may select an already existing farm and on the overview tab, click the upgrade button to increase your total population. (Represented by two golden heads on the resource bar).
Train first Troops
- Troops are made in the Barracks or Stables (if you do not have one, click an open field and order one. You must have the necessary resources.)
- It is your choice to either train troops now or to continue constructing buildings.
- The bigger the army, the better!
Resist the Attacks of Marauders
- Marauders are computerized enemies
- You may see these marauders in the Tactical Page Map labeled as red flags.
- Select the army you have and simply click the enemy you wish to destroy.
a. In the top right hand corner, you should see the name of your army followed by a walking animation and their time of arrival. b. In the event of a battle, it will be represented by two swords crossing each other. c. Seconds later the page should reload with the results on the bottom of the page. d. If you see no red flag, you have beaten the enemy likewise with your green flag.
Setup Coat-of-Arms
- This is the insignia of you and your city, basically the sign you would commonly see on a shield or flag.
- To setup your coat-of-arms, highlight your Settings tab, then click Profile.
- This displays your current information, click on the “Change” button on the left-side Avatar.
- On the bottom of the menu, you’ll find various coat of arms (CoA) to chose from. Select the one that best suites you.
- To customize your own CoA, you must have at least 750 Gold Coins (refer to Gold Coins for more info). Otherwise, you may choose any of the free choices.
- If you have Gold Coins then you may return to the Profile page, and select "Generate Personal CoA".
City - Tactics
Another view of your city, the tactical page shows your army along with ally and enemy troops.
- Your hero is labeled as a green flag.
- Your armies are labeled as green flags.
- Allies are labeled as blue flags.
- Enemies are labeled as red flags.
Each corner of the map has entry points called "Gates". This is where anyone may enter or leave your city. The circles covering each part of the map are waypoints that any army can travel to simply by selecting your army and clicking on a circle. The movement of any army will take time. The time required to move from Point A to Point B is shown in the upper right corner.
- Fixed Squad: The purpose is to keep a specific army separate from others. Selecting the box will ensure your army does not mix with another one of your armies.
- Formation: Set on default, you can configure your armies formation by re-ordering how your army will be setup. You may choose what type of soldiers to put into the front lines where they are the most likely to be killed. This allows some interesting strategic choices.
- Aggression: Low (Not to attack anyone within view), Range (Attack within view but does not pursuit), High (Attack when in view/range and pursuit)
- Attack Range: Melee (Attack within circle) - Adaptive (Attack within the army’s range or circle) - Ranged (Attack when in ranged sight of army).
Rename Army
- You can give your armies creative names to express yourself.
- Flag selection’s purpose is to give each army its own symbol for instant recognition.
Join Selected Army
- Select the armies you wish to group together and click “Join Armies” Then select the group you want to expand. This makes the other group walk over to the selected Army and form as one.
Split Armies into Two
- Splitting the army into two will separate your troops into two bands.
Select All/None
- Selects all your troops or deselects those that are selected.
Advanced Options
- Disband/kill selected Armies (Self-explanatory).
- Register Armies in this city (Relocates that army's population to the city you are at)
Order Armies to leave the city
- Before selecting your command (Aid or Attack) you must select which Army you are sending off.
- Input the name of the Army and set their Aggression, Attack Range and Battle formation (You may select a previously saved formation or simply make a newer formation).
- Input the coordinates of a city you wish to send your troops to. The name of the city and corresponding player name will be displayed on top of the coordinates.
- Set the pace of your Army to reach destination (Normal sends them at a moderate speed or you have the option of paying three gold to whip your troops into a frenzy and speed their arrival time.
- Select Aid or Attack (Aid to relieve the selected city)
- Unemployed troops (found on the top right hand corner of your browser, displays your soldiers who are not in any campaign or not in a fixed group).
Map - Valley
Also known as the World Map, the map shows your city as well as other players around the world. Pointing your cursor over a city will display the player's name followed by their coordinates, city name and current points.
- The Map Legend on the right side of your browser displays the status of a city to you.
- Unflagged cities are automatically considered neutral. That means they have no alliance or aggression toward you.
- From this view you can also selectively choose who you want as your ally, enemy etc... By selecting the city you view their profile.
- The profile shows you their relations with other players, owned cities, rating and reputation.
- On the right side of the profile, it gives you five options.
                 a. Send Campaign (Aid or Attack)
                 b. Private Message (PM)
                 c. Offer Ally
                 d. Declare War
                 e. Non-Aggression-Pact (NAP)
The arrows around the valley map allows you to scroll through the valley. On the bottom of the map, it gives you the Valley # and the X and Y coordinates. By inputting these coordinates, it’s possible to find a specific player.
Map - Attack
By selecting a city it is possible to send a campaign to attack or aid someone.
- Before selecting your command (Aid or Attack) you must select which soldiers you are sending off.
- Unemployed troops (found on the top right hand corner of your browser, displays soldiers who are not in any campaign or fixed group).
- Input the name of the Army and set their aggression, attack range and battle formation (You may select a previously saved formation or simply make a newer formation).
- Input the coordinates of the city you wish to send your troops to. The name of the city and player name will be displayed on top of the coordinates.
- Set the pace your army will travel to their destination at (Selecting normal sends them at a moderate pace or you can spend 3 gold to make them run like the wind
- Select Aid or Attack (Aid to relieve the selected city)
Politics - Messaging
- This shows your received messages. To switch to sent messages simply click the red arrow under the AD 1100 logo. You may view vassal and ally offers by clicking on the hourglass in-between the green and red arrows.
- On the left side of the screen you may write a new message, reply to a received message, delete some or block a sender.
- By clicking “Mark All Messages as Read”, you eliminate the flashing unread message icon at the top of the screen.
Politics – Vassals
- Vassals are players that pay taxes to a stronger player in return for their protection
- You do not want to be a vassal; you should only become somebody’s vassal if you are in deep trouble.
- To be able to have other players as your vassals you must construct a level 1 Obelisk of Glory and fill it with resources.
- This tab allows you to view all your vassals
Settings - Profile
- You may change your user name, email and password here
- Its also possible to record your birthday date and change your Coat of Arms.
Settings – Settings
- The map scrolling speed is how many boxes you wish to scroll each time you click the arrow on the valley map.
- The update frequency is how often you wish the game to show any changes that have happened. You should lower or raise the update bar depending on your internet speed.
- Selecting “Warriors as Transport” allows your soldiers to carry goods to fulfill your trading wishes. This allows you to make trades when your city has no carts available. Unfortunately, your warriors will be gone for as long as the trade takes.
- The army control lag is how much time passes before you the computer ignores your previous order. If for example, the lag is set for 20 seconds, your army aggression is high and enemy troops are spotted. If you order your troops to retreat, they will follow your command for 20 seconds. Then the computer will take over and make decisions based on your army settings. In this case it is aggressive, so your troops would charge toward the enemy.
- Graphical combat logs are merely the regular combat logs but with pictures of the troops in addition to their name.
- To the right there are various options you can change such as army formation, subscribing for bonus features, placing your account in vacation mode and so on.
Help - Forums / Website
- Highlight the Help tab on the upper right corner of the screen
- By selecting Forums, it will link you to the there. You can suggest new ideas for the game, ask developers to solve any bugs you are experiencing or find out news about the game.
- The other link will take you to the main webpage where you can find screenshots of the game and register for an account in another world.
Learning the various buildings and their roles
Basic Buildings
Castle
- The castle is required for your settlement to operate.
- This is also where you hire your hero and revive your hero (for free if he is your only hero. Go to the tavern to revive a paying hero for 50 gold or resurrect either free or paying hero in the temple for a cost of gold)
- A listed view of your city's buildings and their current level will be displayed.
- Mercenaries are found here for hire. An Obelisk of Glory is required to unlock these units.
- In order to Terraform (clearing land to build on) you must reach an upgrade level of 6.
- Upgrading: Decreases build time by a certain amount of percentage.
- Upgrading your castle is required for other buildings to reach their new upgrade level.
- No extra space required when upgraded.
Storehouse
- Also required for your settlement to operate.
- The storehouse is where all extracted resources are stored.
- On the Resources Tab, your current flow of resources per hour and possible expenses are displayed.
- Income(+###) is the max amount of resource collected each hour. Castle provides +10 resources for each type.
- Expenses(-###) is the amount of each resource that is taken per hour.
- Upgrading: Increases the max storage of extracted resources.
- No extra space required when upgraded.
Farms
- Built manually, the farm is required for your city to progress.
- Farms provides population so that other buildings in your city can be supplied with workers.
- Farms are also necessary for training troops.
- Population numbers go down when you build, upgrade, or train warriors.
- Upgrading: Increases population amount provided (not per hour).
- No extra space required when upgraded.
- Restrictions: Limit 20 per town.
Resources Extraction
Sawmill
- Used for producing wood.
- Upgrading: Increases production of wood per level. Higher amount of wood collected per hour.
- No extra space required when upgraded.
Coal Mine
- Used for producing coal.
- Upgrading: Increases production of coal per level. Higher amount of coal collected per hour.
- No extra space required when upgraded.
Iron Mine
- Used for producing iron.
- Upgrading: Increases production of iron per level. Higher amount of iron collected per hour.
- No extra space required when upgraded.
Lime Oven
- Used for producing lime.
- Upgrading: Increases production of lime per level. Higher amount of lime collected per hour.
- No extra space required when upgraded.
Quarry
- Used for producing stone.
- Upgrading: Increases production of stone per level. Higher amount of stone collected per hour.
- No extra space required when upgraded.
General structures
Cache
- Cache is another storage unit for some of your resources.
- Unlike the Storehouse, this building will prevent a certain amount of your resources from being robbed.
- Upgrading: Increases capacity of resources stored in the Cache.
- No extra space required when upgraded.
Restrictions: Limit 1 per town.
Strongbox
- It basically provides extra resources storage.
- The strongbox can be robbed just like the storehouse.
- Upgrading: Increases the amount of resources that can be stored at any one time.
- No extra space required when upgraded.
- Restrictions: Limit 10 per town.
Marketplace
- The Market place hosts your resources trade with outside settlements.
- You can also receive resource support from another city that belongs to you.
- There is a 5-1 maximum trading ratio limit. Example: You cannot trade 1 wood for more than 5 iron.
- Carts are generally used to transport goods but under Settings there is an option to use your warriors to carry resources.
- To place an order on the market, go to “My Orders” at the bottom of the market page. Select the resources you want and the ones you are willing to trade in return. Then hit the two arrows at the top of the page to make your order official.
- It is also possible to exchange one type of resource for another type that you are short of by going to the exchange tab. The exchange ratio is originally 85-1, but can be reduced by upgrading your market.
- Upgrading: Increases the amount of resources you can trade at a time and decreases the ratio for exchange.
- No extra space required when upgraded.
Repair Squad
- The higher this building is upgraded, the faster damage done by rams and catapults is repaired.
- The other purpose is to construct underpasses between your various cities or possible vassals. Underpasses cut travel time between those cities by 30-50%. Before building an underpass, you must pay gold. (The amount differs depending on the distance of the tunnel)
- Upgrading: Faster repairs for your buildings
- No extra space required when upgraded.
- Restrictions: Limit 3 per town.
Obelisk of Glory
- After you build and fill the resource tab, you are allowed to accept vassals.
- The other purpose is to get “Mercenary Points” which allow you to purchase various mercenaries to supplement your army.
- Upgrading: Allows more mercenary points to purchase more mercenaries
- No extra space required when upgraded.
- Restrictions: Limit 1 per player.
Tavern
- The tavern is where you can find additional heroes to hire. (requires 50 gold to hire and a 5 gold per day fee)
- In addition, you can easily see the total amount of troops you have spread across your cities and on campaigns.
- It is also a requirement to upgrade your library
- You can auction a level 5 or higher hero to receive gold if he is bought.
- Here you can revive a additional hero for a cost of 50 gold (do not do this for your free hero, revive him in your castle). Do this soon though since your dead hero may disappear and never to be seen again.
- Finally, you are able to purchase strong heroes that other players have put up for auction.
- Upgrading: You may purchase a hero that’s being auctioned
- No extra space required when upgraded.
Temple
- The temple allows you to donate resources to improve your reputation (requires a level 5 temple to donate).
- When your reputation becomes to low you can no longer declare war or accept vassals.
- You can also resurrect a hero here.
- Upgrading: Resurrect a hero with no experience loss
- No extra space required when upgraded.
Rally Point
- The rally point is where all your troops and siege weapons gather after they are created.
- Upgrading: No upgrade available
Well
- The well adds 400 population to your town. However, there is a twist to this. The well acts as a hiding place for thieves so at random times you may receive a town message from a merchant saying the thieves stole some of his resources. All you have to do is to explore the well with your hero to get the resources back, but beware, the thieves may attack you.
- Restrictions: Limit one per city
- Upgrading: No upgrade available
Library
-

- If you wish to own more than one city, the library is essential. By donating resources you attempt to get your knowledge level to 100%.
- For every level you upgrade the library, the resource tax goes down 10%.
- Upgrading: Decrease the taxation of resources you donate.
- No extra space required when upgraded.
Library: Tax Collection
Sooner or later you will have need to perform Tax Collection. You may want to activate Vacation Mode (minimum 5 days) or unexpectedly have to be away from the game for an extended amount of time. In that case, here is a concise summary of the steps that can be taken to hopefully make use of the Game's Tax Collection features.
- Click on the library, preferably in a city you have a hero in with Master Knowledge.
- Click on the COLLECTOR tab
- Note how the "Distributing to: Library Efficiency:" equals 20%
- If you have any heros in this city, they will show up in the top window. Mouse over each of the the heros and find the one with the highest Knowledge level (None, Novice, Expert & Master is highest). Click on the hero you want collecting taxes in this city and their image will appear in the "Distributing to" window, like so:
See how, in this case, the Efficiency increased to 30%! This hero has NOVICE Knowledge! She has a better efficiency rate than having no hero or one with no Knowledge. Selecting a hero with no Knowledge is equivalent to the default 20% tax collection rate. More on this later.
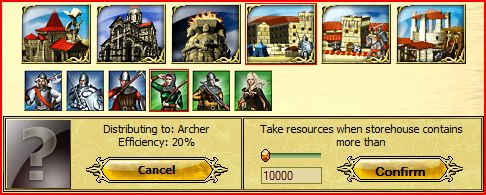
- Now choose the building you want your taxes to be distributed to: Library, Temple, Obelisk, Barracks, Stable, Workshop.
For Barracks, Stable, or Workshop: select the troop type you want created (you can only select one). For instance, in this picture the Barracks was selected
The Archer is selected in this next picture.
Notice how the icon is highlighted in red and the "Distributing to:" window tells you Archers would be created as a 20% tax rate, in this instance.
- Now decide at what resource level you want the Taxes to begin being collected at. In this picture, it is currently set at 10000. Please NOTE! In this scenario, the lowest quantity resource must be at least above 10000 in order for taxes to start being collected.
WARNING: if you do not manage your resources (by using Marketplace Exchange, for instance) such that they are close to the same levels and start collecting taxes, it is possible to lose large amounts of resources. More on this later.
- Once you are happy with the settings you have selected, Click on the CONFIRM button.
- Once you LOGOUT of the server, using one of these two choices (the Logout word or keys):
Tax Collection begins assessing your settings and if all conditions are met, your taxes will begin being applied to the appropriate building at the rate indicated.
Note: If you merely close your browser window and do not logout, it will be some time before the server recognizes that you are no longer connected. Tax Collection WILL NOT start working until the server sees you are no longer logged in! I merely make note of this because, inevitably, some of you are going the test this and holler at us on the Forums an hour later saying this does not work. It may be as simple as you were never logged out and therefore, Tax Collection never started working.
Better to be thought a fool than to open your mouth and prove it!
Library: Tax Collection: Extended notes
- Optimally, if you activate Tax Collection for whatever reason, it would be wise to put as many Heros with Knowledge to work in as many cities as possible.
- It would also be wise to activate tax collection in all your cities even though you do not employ a hero in that capacity. Twenty percent efficiency is better than throwing the resources away.
- Additionally, you should increase the resource minimum to about 28000 (observations indicated that in certain situation it may need to be set lower) so that upon your return you have the opportunity to apply your resources at 100% efficiency.
- The Efficiency rates of your heros with Knowledge are:
Novice = 35% Expert = 45% Master = 65% You can gain an additional 30% by being a Gold Account holder. Therefore your total tax efficiency will be 95% in each city where you have a Hero with Master Knowledge.
Military buildings
Barracks
- The Barracks is used for training your infantry.
- Barracks consists of six (6) types of soldiers.
- Pikeman
- Swordsman
- Man-at-Arms
- Archer
- Marksman
- Ranger
- Upgrading: Every level you increase your barracks reduces the time needed to train soldiers. Before you can upgrade to level 4 or 9, you need to surround two sides of the building with level 1 barracks.
- Level 4: Allows training of 4 troops at once
- Level 9: Allows training of 9 troops at once.
- A multicell building, upgrading to a level 4 will require a 2x2 or 4 cells of space.
- Upgrading to level 9 will require a 3x3 or 9 cells of space
Stables
- The Stable is used for training your cavalry.
- Stables consists of three (3) types of soldiers.
- Scout
- Horseman
- Knight
- Upgrading: Every level you increase your stables reduces the time needed to train Calvary. Before you can upgrade to level 4 or 9, you need to surround two sides of the building with level 1 stables.
- Level 4: Allows training of 4 Calvary at once
- Level 9: Allows training of 9 calvary at once.
- A multicell building, upgrading to a level 4 will require a 2x2 or 4 cells of space.
- Upgrading to level 9 will require a 3x3 or 9 cells of space.
Workshop
- The Workshop is used for producing carts and siege weapons.
- Workshop can produce three (3) types of machines.
- Cart (Transfer resources)
- Battle Ram (Destroy walls)
- Catapult (Destroy buildings)
- Upgrading: Every level you increase your workshop reduces the time needed to build machines. Before you can upgrade to level 4 or 9, you need to surround two sides of the building with level 1 buildings.
- A multicell building, upgrading to a level 4 will require a 2x2 or 4 cells of space.
- Upgrading to level 9 will require a 3x3 or 9 cells of space.
DEFENSE
Wall
- Walls slow down enemy units.
- In addition, cavalry and siege weapons cannot pass over walls.
- If you place soldiers on a wall they gain a defensive bonus.
- Only rams can destroy a wall
- Upgrading: More health and a bigger defensive bonus.
Gates
- Gates allow your allies to send cavalry and siege weapons into your city.
- Has 2x the health of walls at the same level
- Restrictions: Limit 5 per city
- Upgrading: More health.
Alliance System
Ally Pact
- Ability to aid each other.
- Can't attack pact member's cities.
- Will not engage in combat on neutral or enemy grounds.
- Time it takes to break pact: 1 day or when accepted by other pact member.
- Cost to send pact: 0 Reputation.
- Cost to break pact: 10 Reputation.
- No minimum reputation needed to send or break pact.
Non-Aggression Pact
- Can't attack pact member's cities.
- Will engage in combat on neutral or enemy grounds.
- Time it takes to break pact: 1 day or when accepted by other pact member.
- Cost to send pact: 0 Reputation.
- Cost to break pact: 10 Reputation.
- No minimum reputation needed to send or break pact.
Truce Pact
- Only way to end war
- Can't engage in any war activities against other pact member.
- Can't attack pact member's cities.
- Time it takes to break pact: Will automatically break after one week. Can't break manually.
- Cost to send pact: 0 Reputation.
- Cost to break pact: 0 Reputation.
- No minimum reputation needed to send or break pact.
War Pact
- Ability to use catapults against other pact member to destroy other buildings than walls excluding castle.
- Ability to capture other pact member's town, even if they are active.
- Cost to send war: 50 Reputation.
- Cost to break war: 0 Reputation.
- Minimum reputation needed to send war: -199 Reputation.
- Minimum reputation needed to accept war: -199 Reputation.
Vassal Pact
- Ability to send aid to other pact member.
- Ability for vassal to inherit lord's allies as Non-Aggression pacts
- Ability to pay lord for protection.
- Ability to inherit lord's war pacts.
- Cost to send vassal pact: 0 Reputation.
- Cost to break vassal pact: 10 Reputation.
- Minimum reputation needed to send vassal pact: -149 Reputation.
- Minimum reputation needed to accept vassal pact: -149 Reputation.
Vassal Payment Options
Glory Point Tax
- Lord receives a set amount of glory points, even if use by vassal.
- Vassal receives all glory points back if Pact is broken.
- Glory points is A.K.A mercenary points.
Library Resources Tax (percent per each input)
- Depending on vassal deposits into his or her library, the lord gets a set percentage of that added to his or her library which is taken away from vassals total amount donated to his or her library.
Gold Payment Tax
- lord decides on the amount of gold per day the vassal pays to him or her.
- Lord will not get paid unless vassal has gold.
Library resources tax (on timer)
- Same as Library Resources Tax (percent per each input) option but over a set amount of time instead of instantaneous.
Conclusion
MORE INFO: Compare with http://1100ad.feildmaster.com/wiki/Main_Page
- As this game is still in Beta, rules and play are subject to change
